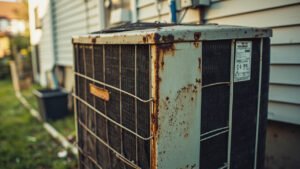
Leaky ductwork is one of the most significant and least visible sources of energy waste in American homes. Learn about HVAC installation standards → The average U.S. home loses 20–30% of the air moving through its duct system to leaks, gaps, and disconnections — meaning 1 in 3 dollars spent on heating and cooling goes directly into your attic, crawl space, or basement rather than the rooms you are trying to condition. Sealing ductwork typically costs $500–$2,000 and pays for itself in 1–3 years through reduced energy bills, with the added benefit of improved indoor air quality and more consistent temperatures room to room.
How Much Energy Are You Losing Through Leaky Ducts?
Leaky ductwork in the average U.S. home accounts for 20–40% of total HVAC energy consumption — losses of 200–400 kWh per month in a typical 2,000 sq ft home, depending on duct location, system design, and the severity of leakage. This is not a minor inefficiency — it is the single largest source of energy waste in most homes.
Where the Losses Occur
Duct leakage is worst in unconditioned spaces — attics, crawl spaces, and garages — where the pressure differential between the duct interior and the surrounding air is greatest. In an attic that is 120°F in summer and 30°F in winter, a small leak in a supply duct can lose 50–70% of the air moving through it to the attic before the air ever reaches the living space.
Return air leaks are often more damaging than supply leaks because they pull unconditioned air from attics, crawl spaces, and garages into the system — introducing dust, allergens, mold spores, and combustion gases (from fossil-fuel appliances in the garage or attic) directly into the air you breathe.
Quantifying the Energy and Dollar Cost
For a 2,000 sq ft home with a 3-ton central AC system running 8 hours per day in summer:
- Duct leakage of 25% means roughly 600 kWh per month of wasted cooling
- At $0.14 per kWh, that’s approximately $85 per month in wasted energy — or over $1,000 per year for cooling alone
- Winter heating losses from ducts are proportionally similar, potentially adding $400–$800 annually depending on climate and fuel type
A $1,500 duct sealing job pays back in 1–2 years from energy savings alone, before considering comfort improvements and air quality benefits.
What Causes Duct Leaks?
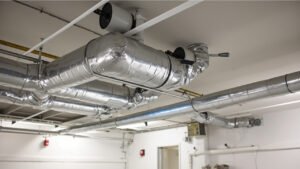
Duct leaks occur at connections ( elbows, tees, boots), at the equipment interface (furnace plenum, air handler cabinet), at the register boot connection to the wall or floor, and along the length of flexible duct runs where the outer plastic jacket has been torn or disconnected. Most duct systems use sheet metal (for main trunks) connected with snap-lock seams and sheet metal screws, and flexible duct (for branch runs to individual rooms) attached to metal collars with zip ties or clamp rings. Both connection types deteriorate over time.
Connection Leaks
Every joint in a duct system is a potential leak point:
- Plenum connections — where the ductwork attaches to the furnace or air handler, sealed with mastic or foil tape
- Elbow joints — 90-degree and 45-degree bends where two pieces of duct meet
- Branch takeoffs — where a smaller branch duct connects to the main trunk
- Tee junctions — where two ducts join to form a T-shape
These connections are sealed with either mastic (a paste-like sealant that stays flexible as it dries) or foil-faced tape (not standard duct tape — only UL 181-rated foil tape qualifies). Standard cloth “duct tape” fails within 1–3 years of exposure to temperature extremes and is not a proper sealant.
Equipment Interface Leaks
The furnace plenum and air handler cabinet are the largest leak sources in many homes. The furnace plenum — the large metal box that collects conditioned air from the blower and distributes it to the duct trunk — must be perfectly sealed to the furnace cabinet. Over time, the gasket material deteriorates, screws loosen, or the plenum develops cracks from thermal expansion and contraction.
Air handler cabinets (in attics or closets) develop leaks at the door seams, at the filter slot, and around the coil access panel. These leaks can be massive — some installers find air handlers with 2–4 inch gaps in the cabinet that effectively bypass the filter and dump unconditioned air directly into the supply plenum.
Flexible Duct Failures
Flexible duct (often called “duct board” or “insulated flex”) is lightweight and easy to install, but it is also fragile. The outer polyethylene jacket tears easily during installation, during attic remodeling, or from pest damage. The inner wire helix kinks and collapses if walked on or compressed. The connection collar (where the flex duct attaches to the boot or trunk) loosens as the zip tie ages and the collar slips off the metal duct.
When a flexible duct kinks or collapses, airflow drops dramatically — affecting the room served by that run. When the collar slips, air escapes directly into the attic. Both problems are fixable without replacing the entire duct run.
How Duct Testing Works — Blower Door and Duct Blaster
Duct leakage is measured using either a duct blaster (which pressurizes only the duct system with the rest of the house at atmospheric pressure) or by using a blower door (which depressurizes the entire house) with all registers sealed and measuring the resulting airflow through the duct system. Both methods produce a CFM25 leakage reading — cubic feet per minute at 25 Pascals of pressure — which is then converted to a total leakage area in square inches.
The Blower Door Method
A blower door is a calibrated fan that fits into an exterior door frame. With the HVAC system turned off and all supply and return registers sealed with a cover or tape, the blower door runs to depressurize the house to 25 Pascals (a standard test pressure). The fan’s airflow at 25 Pascals is measured.
Then, all duct registers are unsealed and the HVAC fan is turned on while the blower door still runs. The additional airflow through the fan represents the duct leakage — air that exits the duct system through leaks and enters the house through the same leaks. This test measures total duct leakage relative to the conditioned space.
What the Numbers Mean
For a 2,000 sq ft home with 3 tons of cooling capacity, duct leakage above 250 CFM25 is considered severe and warrants immediate remediation.
Duct Blaster Specifics
A duct blaster pressurizes the duct system directly by sealing the supply and return registers with covers and pumping air into the duct system with the house at atmospheric pressure. This isolates duct leakage from building envelope leakage, giving a precise measurement of only the duct leaks. This is more accurate for measuring duct performance but requires more equipment and time.
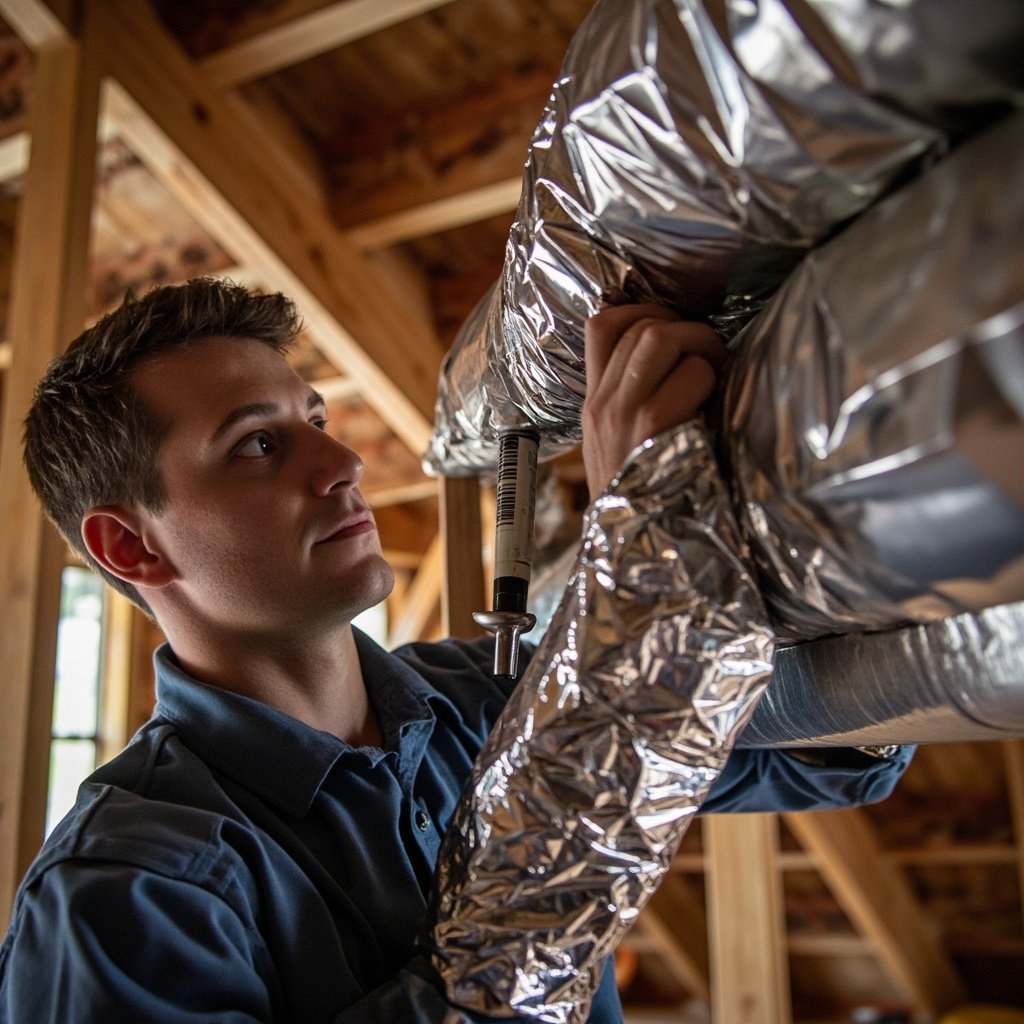
How to Seal Duct Leaks
Seal duct leaks using mastic for large gaps and joints, UL 181 foil tape for seams and smaller gaps, and mechanical clamps (zip ties, sheet metal screws) for flexible duct collar connections. Never use standard “duct tape” — it fails within 1–3 years. Do not seal ducts from the inside using aerosol-based “duct sealing” products — they are not a substitute for mechanical sealing and can damage equipment.
Sealing Sheet Metal Joints
- Clean the surface — wipe dust and debris from the duct joint with a dry cloth
- Apply mastic with a putty knife or stiff brush — press it into the seam, covering 2 inches on each side of the joint
- For larger gaps, use fiberglass mesh tape first to bridge the gap, then cover with mastic
- Allow mastic to fully cure (24–48 hours) before running the system
Mastic is preferred over tape for sheet metal because it forms a permanent, flexible seal that moves with thermal expansion without peeling.
Sealing Flexible Duct Connections
- Pull the collar firmly onto the metal boot or trunk fitting — use needlenose pliers to grip and tighten the collar
- Secure with a stainless steel worm-drive clamp (not a spring clip) — tighten to 15–20 in-lbs of torque
- For tears in the outer jacket, apply UL 181 foil tape over the torn area, then wrap with insulating duct wrap to match the original insulation
- For kinked flexible duct, replace the damaged section — do not leave a kink in place as it restricts airflow permanently
Sealing the Equipment Plenum
Sealing the furnace or air handler plenum is best done by a professional — access typically requires removing the furnace cabinet panels and applying mastic inside the seams where the plenum connects to the cabinet. Homeowners can apply mastic to accessible exterior seams of the plenum, but the top and front connections under the cabinet require professional service.
When to Call a Professional for Duct Sealing
Call a professional HVAC contractor for duct sealing when the duct system is in an unconditioned space (attic, crawl space) with significant leakage, when the furnace air handler cabinet shows signs of major air leakage, when the duct system is made of fiberglass or has internal insulation (Mylar-lined ducts) that may be damaged by mastic, or when a full duct pressure test is needed to measure the before and after leakage. Professional sealing costs $500–$2,500 depending on home size and leakage severity.
Finding a Qualified Duct Sealing Contractor
Look for a contractor who:
- Uses blower door testing to measure leakage before and after — not just visual inspection
- Offers aerobic duct sealing (injecting sealant through small holes into the duct interior) if the ducts are in an inaccessible location
- Provides a written report with CFM25 measurements and sealed areas documented
- Holds an NATE certification or equivalent licensing for your state
- Offers a workmanship warranty of at least 1–2 years
Avoid contractors who quote a flat price without inspecting the system and measuring leakage first. The price should reflect the actual leakage found, not a guess.
HVAC Duct Sealing FAQ
Does sealing ducts affect my indoor air quality?
Yes — in a positive way. Sealing return air leaks prevents attic dust, crawl space mold spores, and garage fumes from being pulled into the air system. Sealing supply leaks prevents conditioned air from being lost and keeps static pressure in the ducts higher, which improves air filtration efficiency at the filter slot. However, sealing supply vents without also sealing the return can create negative pressure in the home, which draws outside air in through cracks and gaps — potentially making indoor air quality worse. A balanced duct system with both supply and return sealing is the goal.
How long does duct sealing last?
Professionally applied mastic and foil tape sealing lasts 10–15 years or longer if applied correctly. Cheap foil tape (non-UL 181 rated) may fail in 2–5 years. Flexible duct connections secured with zip ties (not worm-drive clamps) may need re-tightening within 5 years as the zip tie material degrades. Annual HVAC maintenance should include a visual inspection of accessible duct connections.
Can I use spray foam to seal ducts in an attic?
Spray foam (such as expanding polyurethane foam) can seal large gaps in an attic where mastic can’t reach, but it should not be used inside the duct or at connection points where temperature extremes cause expansion and contraction. Use closed-cell spray foam only for gaps around the plenum, around duct boots where they penetrate the ceiling, and in areas where the duct attaches to the building structure. Do not spray foam inside the duct itself.
Will sealing my ducts make my house feel stuffy?
Not if the house has adequate mechanical ventilation. When ducts are sealed and the home becomes more airtight, the mechanical ventilation system (bathroom and kitchen exhaust fans, or a dedicated ERV/HRV) becomes more important for maintaining air quality. Sealing ducts alone does not make a house “stuffy” — it simply stops conditioned air from being wasted. If your home doesn’t have functioning exhaust fans in bathrooms and kitchens, have them inspected before sealing ducts — the house needs a way to exhaust stale air.
How do I know if my ducts are leaking?
Signs of duct leakage include: large temperature differences between rooms (one room always hot or cold while others are fine), visibly torn or disconnected flexible duct in the attic or crawl space, high summer utility bills relative to neighbors with similar homes, dust accumulation near supply registers, and a musty smell when the HVAC runs. A professional duct pressure test is the only way to quantify exactly how much leakage you have — but a visual inspection of accessible ductwork in the attic and crawl space often reveals obvious problems.